Individual Assignment:
‣ Make an in-circuit programmer by milling and stuffing the PCB, test it, then optionally try other PCB fabrication process.
For my individual assignment I made an ‘in-circuit programmer’ -FabTinyStar. The programmer /board is made by milling the PCB laminate using roland milling machine in our FABLAB.
Fab academy page for electronic production has suggested in- circuit programmer and its design. This asigment concentrate on production side. So, I could Download the ‘png’ file for TRACERS and OUTLINE CUTOUT.(Referred BRIAN Page)


The Machine used is ROLAND Modela MDX-20 that typically seen in FABLABs
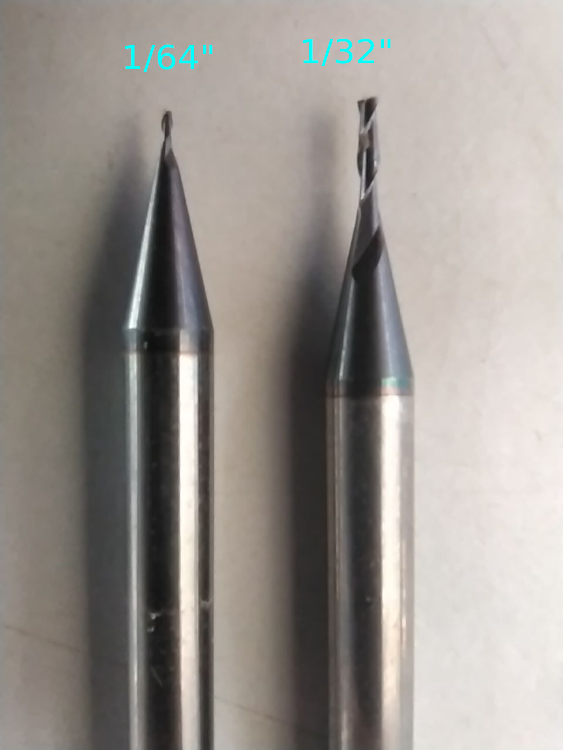
We need to use PCB milling drill bits for the milling operations. Drill bit we used in this week are
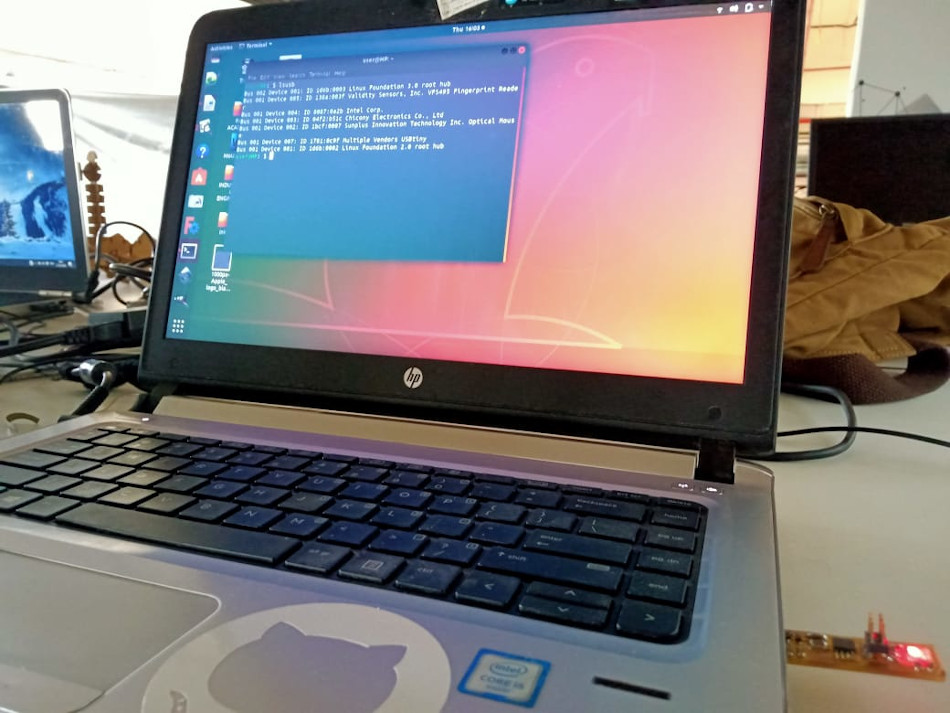
I used ' mods.cba.mit.edu ' to communicate with the machine. MODS is used to generate the file for milling machine. MODS installing and opening details are mentioned in week3_computer cutting . Before starting the opeartion, Make sure that bed is uniform and clean while fixing the FR1 PCB laminate on bed.
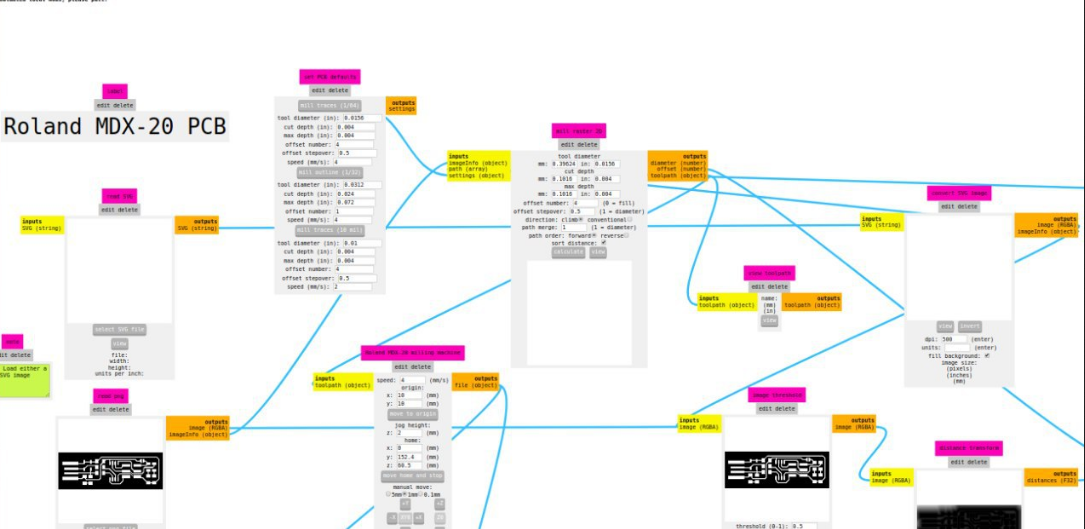
Steps in MODS For PCB Milling Operation
From the image you can see the steps I followed in MODs to do the milling. After inserting the tool in the chuck you need to set the tool. Move the tool to the required home (origin) for this you can use X axis and Y axis move buttons in MODS and also buttons available on the machine.
Next select the tool by pressing it you can see the default setting available in there, Edit the fields if required. Then press the ‘ calculate’ You can the toolpath generated if it seems ok you can send the file by ‘opening the port’ and later press’ send file’. After the machine start milling, keep monitoring for any mistakes or errors
PCB milling in progress
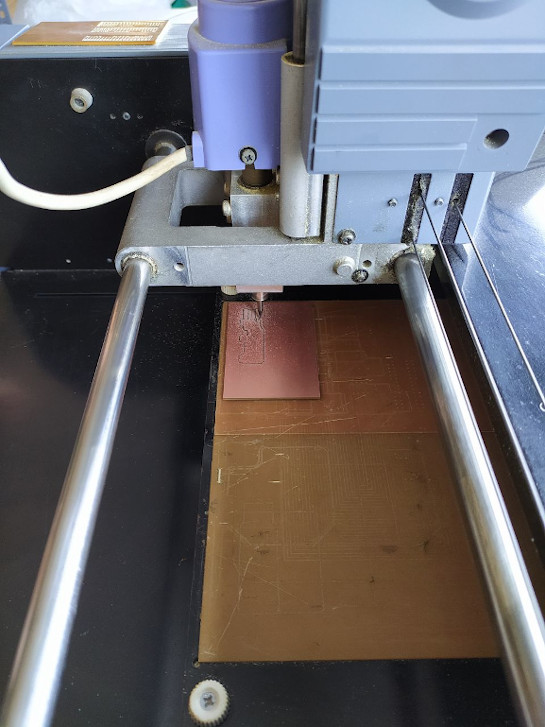
First I tried for milling one circuit. Initially I encountered some errors and the resons i belieave are
1. Wrong calculation in setting orgin for cut process after doing tracing.
2. Non uniform milling due to bed flatness issue, We recitified by giving higher depth of cut.
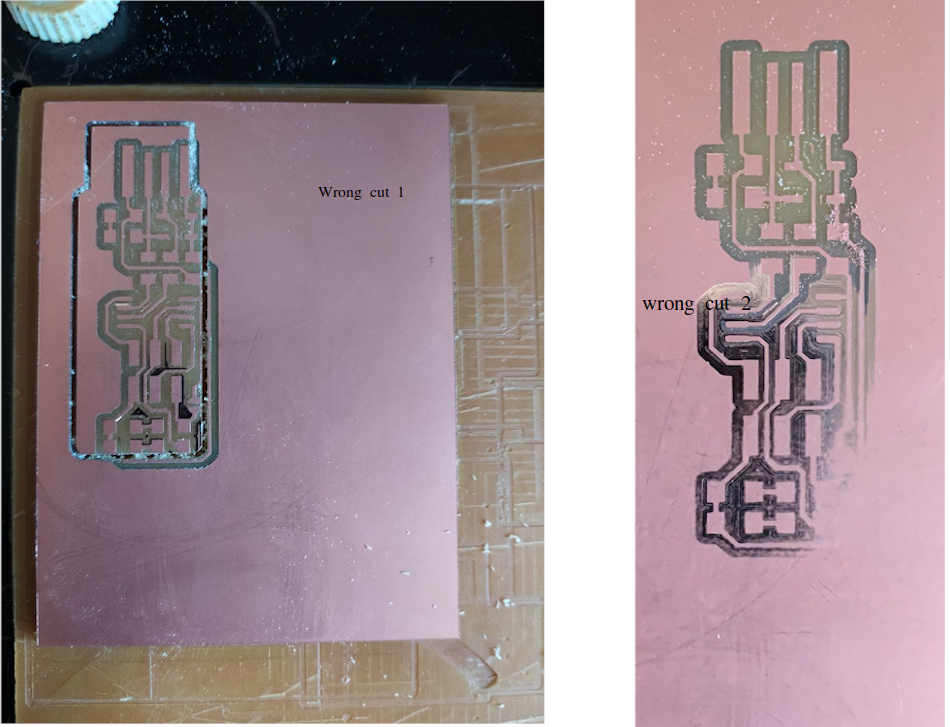
Learned from failures.Then me and my 3 fabacademy classmates togther did milling 4 Circuit in the same board!!!

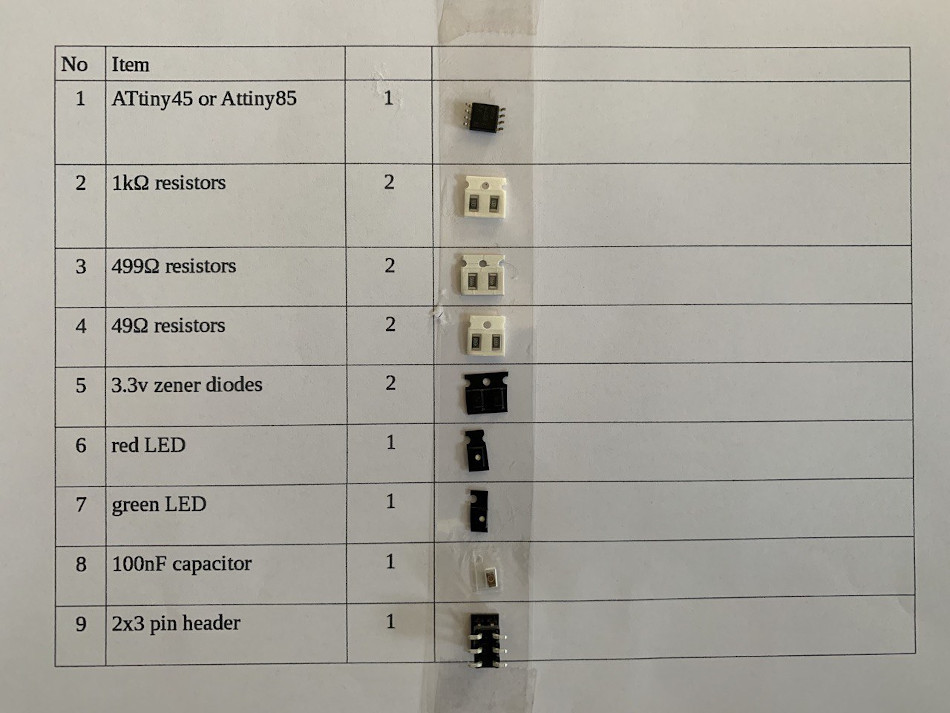
In our fablab our instructed helped us with giving a list of componenets required for this circuit. We procured the items from Fab inventory and using a simple technique we placed the items as shown in image, this procedure will be help anyone while doing the soldering
After this we moved to a soldering station which had 1. Soldering iron, power unit, lens, solder etc. Our instructor showed a demo and we followed. For me it was my first time soldering this smd electronics items and after a hectic one hour task i could complete the soldering
Referred below shown schematic diagram while soldering components
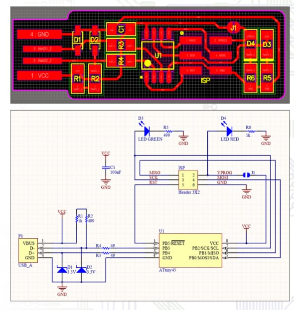
Set the Soldering workstation. Soldering iron, soldering wire, soldering flux
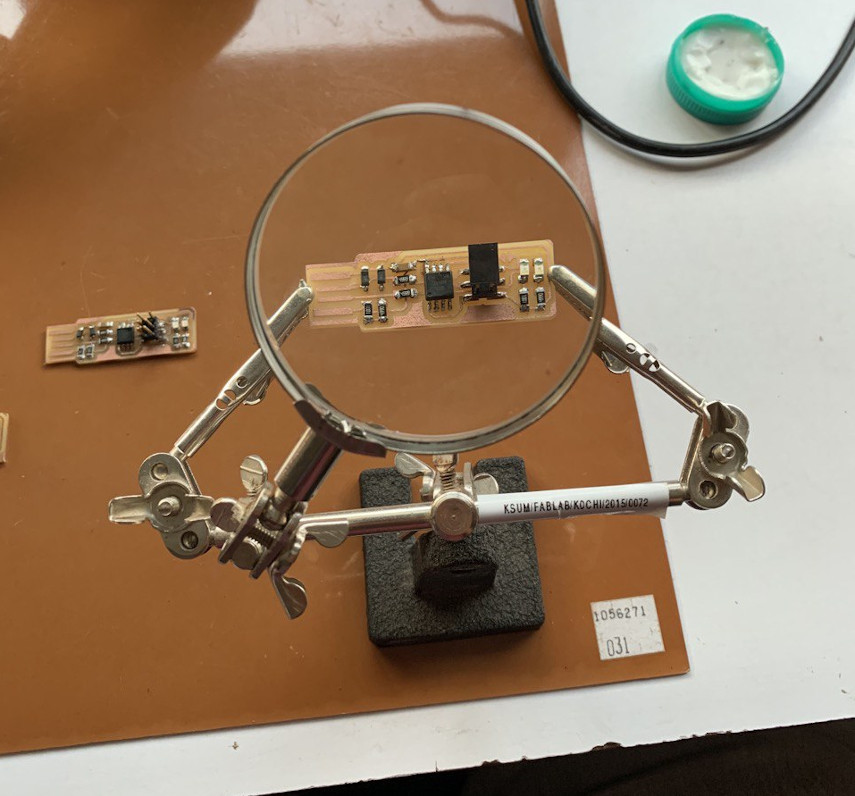
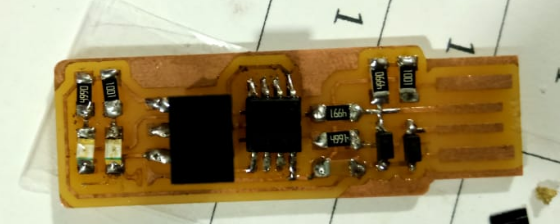
Succesfully soldered all the components on PCB (hero shot)
PROGRAMMING my fabtiny star
For Programming ISP we need to install certain softwares. In UBUNTU terminal commands do this job. I referred this tutorial.
Step 1. Installing avrdude / GCC software and dependencies

Step2. Edit Makefile
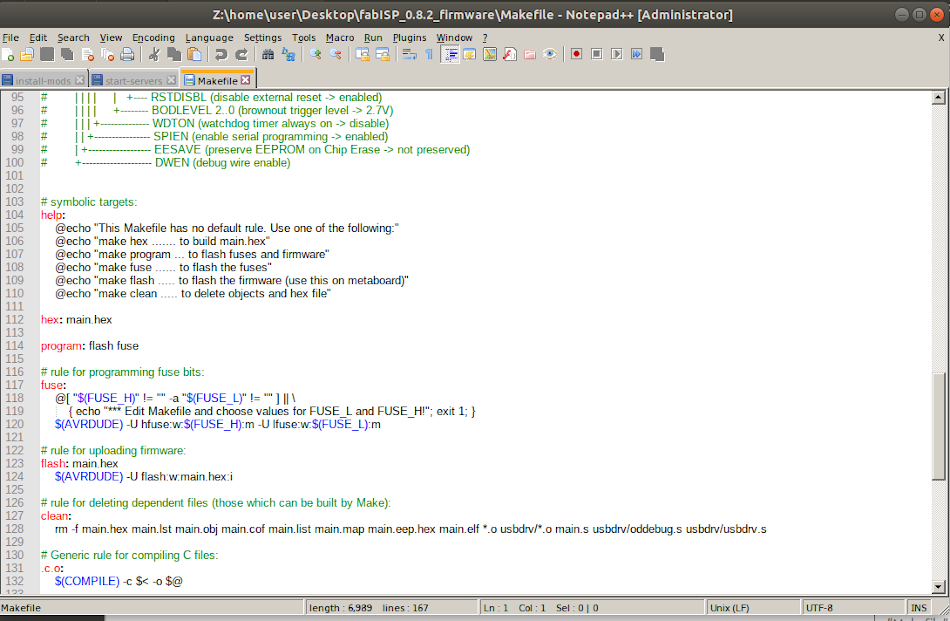
Step3. setting fuse and programming the board using another programmer
Steps I followed to program
While doing this we encountered an error. It is found that we were using firmware(makefile) for Attiny 44 and we were using Atiny 45.
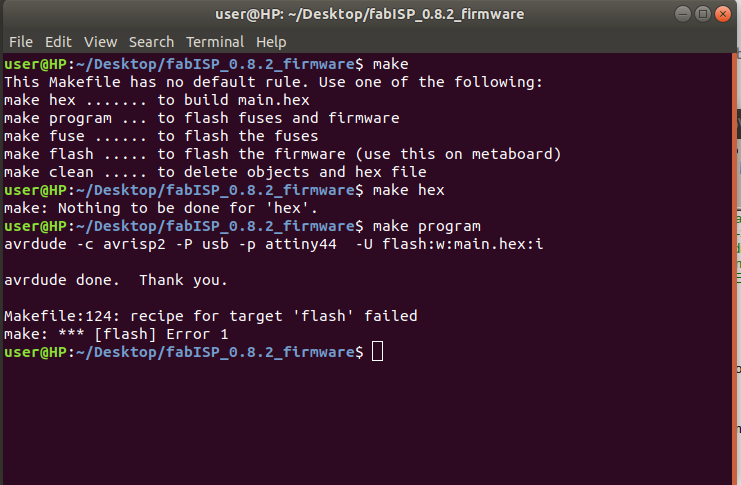
We recitified the problem by downloading the new firmware for Attiny 45 from this link
Tested Ok